Transforming 2x4s into a Farmhouse Bathroom Door
Last Modified: June 2024
My wife and I have been living without a door to our bathroom for several months now, which wasn’t originally a big deal. Now that our toddler is running around, we need to fix that by building a sliding farmhouse door. I will make as much of the door as possible out of 2x4s to add an extra challenge.
Many woodworkers don’t like working with 2x4s, and they aren’t entirely wrong. They can be challenging, but 2x4s can still be transformed into unrecognizable projects with some extra work.
Affiliate links are used on this page. See my disclosure page for info on affiliate programs.
Materials
2x4s
1/2” Plywood
Sandpaper (various grits)
Paint
3” Deck Screws
1 - Clean Up 2x4s
Since 2x4s are notoriously bad-looking, we need to start by cleaning them up a bit. I started by planing them down just until the roughness and marks were gone, but I left them a little thick to remove glue lines later. Once milled up, I took off the rounded corners at the table saw. Again, I left the pieces wide to give me room to refine. Milling this way leaves a piece of wood about as square as a 2x4 will ever get.
2 - Assemble Larger Beams
I used dowels to account for some of the bowing the 2x4s had. The dowels not only help add some needed strength to the glue joints but will help keep the pieces aligned while the glue dries. Once I marked the dowel locations on each 2x4, I used a dowel jig and drill to drill them out.
With the dowels in place, glue-up was a bit easier. I used waterproof glue since the door will be for a bathroom, and we don’t want steam to weaken anything. With the dowels in place and glue liberally applied, I put every clamp I could on the assemblies to keep them in place. I did run out, but I was able to clamp up two assemblies in one with some of my longer clamps.
Once the glue dried, I chiseled off the squeeze out on one side of the pieces, ran each piece back through my planer for the final thickness, and ripped it to the final width at the table saw.
3 - Cut Door Joinery
Tongue and groove joints are standard with doors for a good reason: they are STRONG. I started by cutting the grooves in the exact center of each piece. To make things easier, I used my dado stack and some scrap to dial it in. I like to have my stack slightly thinner than I need but also offset from cutting in the center. If dialed in correctly, this will let me make one pass that’s too thin, flip my piece around, and make a second pass. This two-pass system gets to the final width while ensuring that I am in the exact center of the piece.
With the grooves cut, I can cut the cross pieces to their final length and dial the dado stack in for the tongues, again using some scrap.
Once dialed in, cutting the tongues was very quick, although I did test-fit each one just to be sure. Some of the tongues were very slightly too thick. I took off just a little extra wood with a sharp chisel for those.
4 - Cut Panels
Dry fitting my assembly gave me a real-world measurement for the panels. I’m glad I did because I was slightly off from my plans. Adjusting for reality, I cut the plywood panel with my circular saw, and track saw sled jig. While I try to get better at using the circular saw freehand, the sled lets me dial it in precisely.
I also cut the acrylic to size at the table saw, but not without jamming up my insert plate. Once I cut the acrylic to size, I sanded it for a frosted look.
5 - Assemble Door
Before assembly, I sanded everything through the grits up to 220. Then, using the water-proof glue again, I assembled everything. The slight warp on the 2x4s made it a little more tricky than I initially thought, but clamping one end while I used a mallet on the other was helpful. I slid the acrylic into place before installing the top cross piece and left the assembly to dry overnight.
I went over the entire door and filled gouges and gaps initially with wood filler. My can was a little old, though, so I also used some CA Glue and accelerant to fill (or re-fill) where the filler didn’t work. Once everything was dry, I sanded everything to 320.
6 - Create and Install X’s
No farmhouse door is complete without at least 1 X, and this is no exception. To keep with the 2x4 theme, I planed one side of a 2x4 and then cut some thin pieces with my bandsaw. Re-sawing like this is much easier on the bandsaw than on the table saw. The thinner bandsaw blade also allowed me to get all four pieces from one 2x4 instead of needing another one.
Once I had cut the piece’s thickness, I marked the angles for each cut directly on the door. Since the pieces were so thin, I just a handsaw to cut the pthemlso did this in the middle after marking where the center of the X would be.
Once I cut everything to size, I used wood and CA glue to attach the pieces permanently. The CA glue dries quickly, so I don’t have to worry about clamps, but the wood glue will keep the pieces secured long-term. I also came back and filled any gaps with CA glue.
After securing everything, I sanded up to 320 again.
7 - Paint
I used water-resistant paint to combat steam from the bathroom and applied the coats with a roller. For something like this, a sprayer would have worked as well, but it was a little faster just to roll it with my small roller. Before painting, I added some tape to the acrylic so it wouldn’t get paint on it later (although I missed a spot and had to fix a few spots anyway).
I first painted one side, then flipped the door over and painted the other. When doing this, I made sure not to create any drips on the bottom that I would have to fix and then spot-touch up later.
8 - Install Hardware
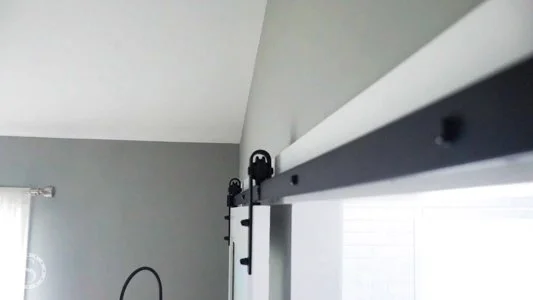
I took careful measurements and installed the rollers on the top of the door. It was slightly too thin for the bolts that came with it, so off-camera, I ground down the bolt length a bit.
Once I installed the top, I repeated similar steps to install the handle. We just estimated the height that we thought it should be, and fortunately, it worked out (having a long handle helped, too). Although I lost the footage of the final hardware install, I bolted on the pieces through the holes with washers and rounded nuts.
9 - Install Door to Wall
It’s finally time to mount the door to the wall! I marked the stud locations and secured the header directly into studs with long, exterior-grade screws. Then, I marked the hole locations, drilled the holes for the rail mount, and mounted the rail to the header with a socket wrench. We later decided to shift the rail a few inches one way, so I had to re-drill the holes, fill the original ones, touch up the paint, and then re-mount, but it wasn’t too bad.
Last thing to do was to roll the door on and install the stops and it’s ready to use!
I’m happy with how the door turned out, but more importantly, so is my wife. By looking at the door, no one would ever guess I made it out of 2x4s, but there are some spots where the imperfections in the wood still come through. We’ll say that adds to the charm of a homemade farmhouse door.
I like transforming ordinary materials into something unrecognizable, so I want to work with 2x4s. I also transformed a bunch of 2x4s into a Power-Carved Mythosaur Skull, which you may also like.


