DIY Workbench: Perfect for Any Growing Workshop
Updated: April 2024
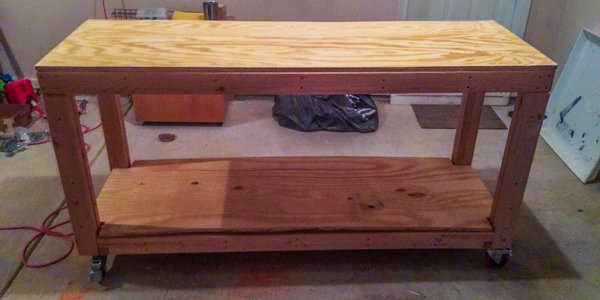
While a workbench was not my first build, I wish it had been. I spent time on the design to ensure I met all criteria: good work area, good storage area, robust, mobile, and expandable. The last bit has been significant as I have learned and grown in my ability, comfort, and knowledge as a maker and DIYer.
The Problem to Solve
My current workspace consists of two sawhorses and a scrap piece of plywood. While this is entirely mobile, I need something more permanent, large, and strong. Additionally, my storage consists of a single, overcrowded, plastic shelving unit. Having additional storage and organizational space will help me solve more problems in the future.
Affiliate links are used on this page. See my disclosure page for info on affiliate programs.
Materials & Supplies
2x4’s
23/32” Plywood (cheaper than 3/4” plywood)
4” Locking Casters
Tools Used
* These are the tools I used then, but now I have better recommendations.
Steps for Build
1 - Design in SketchUp
The main reasons I focused on the design were to ensure what I built would fit in the available space, purchase the right material, solve my problems, and generate a precise cut list. I started in SketchUp. Here, I created a scale design based on the available space.
Once I was happy with the design, I created a detailed cut list with dimensions. The cut list not only gave me a set of cuts I knew I had to make but also allowed me to visualize how I would cut the parts without relying on math. I moved the parts around to minimize waste and maximize my material. The cut list also gave me a list of materials to buy at the home store.
2 - Cut material to size
Once I had purchased my material, I needed to cut it to size. I knew I would be using a circular saw for a majority of the cuts and thought about using the speed square method I had on the raised dog bed. However, I wanted to create an option myself that seemed more precise. I took a few minutes to make a quick circular saw guide. There was a fence for the saw to ride on, a zero clearance side lined up with cut lines, and a hook perpendicular to the saw fence. I believed this would save me time, but I think I over-thought this piece in the long run.
I cut the 2×4 material to length using this jig with the circular saw. One big tip I had seen was only to measure the first cut for repeated dimensions. Once the first is complete, use it to mark the rest. This way, they end up much closer to the same length. Once I had cut the 2x4s, I cut down the plywood. I had no fancy jigs (homemade or purchased), so I manually kept the circular saw straight. Having a laser guide would have made this step easier. The only cut I waited on was the notch out for the bottom shelf.
3 - Build Legs
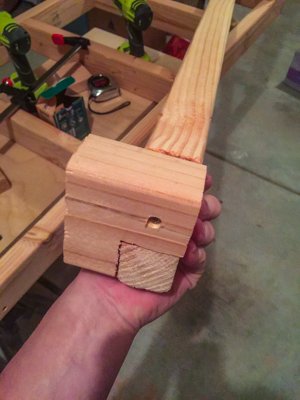
The legs need to be beefy. Initially, the design called for 4×4’s for leg material. However, my research found that two 2×4’s laminated together were as strong and cost less. The legs also needed to have a peg protruding from the top. The sandwiched 2x4s would be easier for a beginner to create with two separate pieces rather than one.
I assembled the legs with glue and 2″ screws. All screws were counter-sunk, so the heads were below the surface. For each leg, one half was shorter than the other to allow for easier peg sawing. I sawed off half of the protruding taller half with a hand saw. Each peg's height was equal to the height of the 2×4 top frame (3 1/2″).
Even though I had taken precise measurements and was utterly confident in my cuts, I checked each peg’s height with a scrap piece of 2×4. I am glad I did. Two legs were perfect. The other two were either slightly too short or too long. The overall height of the legs was correct, but the space between the peg and where the top frame would rest was off.
I used a chisel and carved out the waste for the too-tall side. For the too-short side, I marked a spacer on scrap and carefully cut a shim out with the handsaw. I then glued the shim in place.
4 - Assemble Upper Frame
I started with the external surrounding frame for the top. I wanted to miter the top's visible corners for aesthetics and strength. The joinery of the legs allowed the top frame to be supported equally from the front and sides. I used the tilting feature on my circular saw to cut the 45-degree angles.
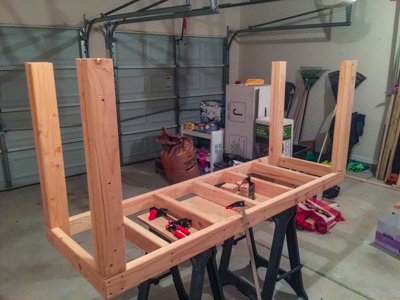
I dry-fit all the pieces together and spaced the struts equally on one of the long sides. The dry fit helped identify where I should drive the screws in. Once marked, I pre-drilled, glued, and counter-sunk two 3″ screws into each cross beam. For the other side, I used my framing square to ensure everything was square before marking the locations to drill holes on the other side. I drilled and counter-sunk holes on that side then used clamps to hold everything together before glueing and screwing from the other side too.
For the mitered edges, I put two screws in from one side and one from the other. Glue along the end grain is not the most robust joint, but the extra screws compensated (in theory).
While not strictly necessary, having an impact driver for these 3″ screws made everything incredibly easy. A drill would work, but this project is where I became appreciative of having the additional functionality an impact driver brings.
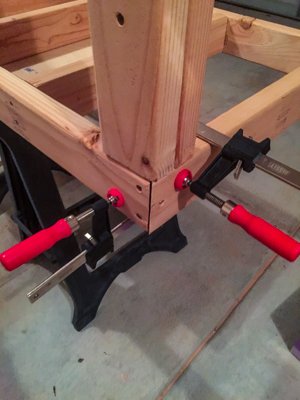
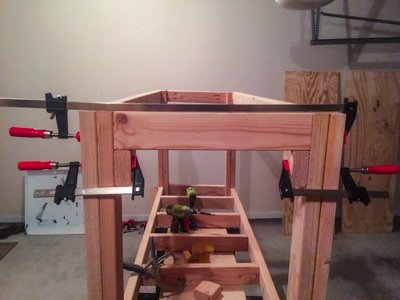
To complete the top frame, I needed to add the legs. I realized how essential clamps are. I used these as a second (or third) set of hands. The clamps allowed me to precisely place the leg pegs before drilling, counter-sinking, gluing, and screwing the legs to the top frame. For each corner, I put two 3″ screws in from one side and one from the other. The clamps also helped keep the legs square to the frame.
5 - Assemble Lower Frame
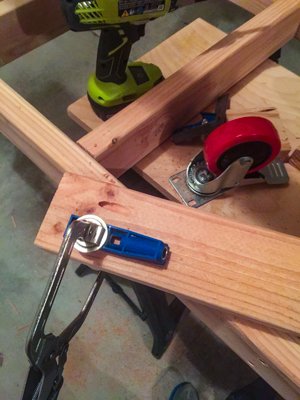
I had not thoroughly considered how the bottom frame connected to the legs or table. I decided to use pocket holes for the short sides. For the long sides, I wanted to have at least a small piece on which the long braces rest. I used some scrap 2×4 pieces to create these ledges. I used a handsaw to cut 1/4 from the scraps to provide a shelf for the long struts. Ideally, I could use dominos or mortise/tenons for this joint, but I did not know these joinery methods then.
I secured the long piece to the scrap shelf with a counter-sunk screw. I then secured the larger piece to the legs with a pocket-hole screw in the long piece and two counter-sunk screws in the scrap shelf. While this sounds complicated, I am positive there is a more straightforward method to join the two pieces (let me know in the comments what you would have done).
After I secured the long ends, I moved on to the short sides and cross braces. I attached the side pieces with pocket hole screws directly into the legs. I added screws to the cross pieces through the long pieces with a counter-sink.
6 - Add casters & Plywood
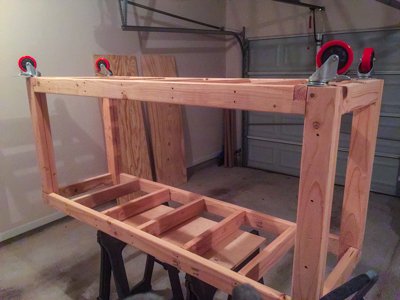
Before flipping the workbench over, I added the locking casters. I placed each caster on its leg and marked the holes. Once marked, the holes could be pre-drilled to prevent the legs from splitting. I secured each caster with four screws and washers.
With the casters on, the time came to turn the workbench over and put it on the ground. I locked the casters before flipping to ensure the table didn’t fly out from underneath me. Once flipped, I pre-drilled, counter-sunk, and screwed one piece of plywood to the top.
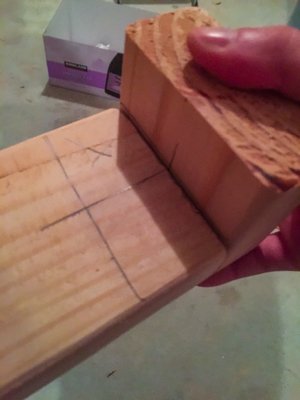
The bottom shelf needed notches cut out of the corners to accommodate the workbench legs. I marked each corner using two stacked scraps of 2×4. I used a hand saw to cut corners out. Once cut, I placed it in place. I did not screw it down so I could have maximum flexibility in the future.
Overall, this was an easy build. It was my largest build then but a fantastic learning experience. I could have built an adequate workbench more quickly using more straightforward joinery methods. However, challenging myself with a small amount of beginner complexity significantly boosted my confidence.
I use this workbench on almost every single subsequent project. After the initial, I added additional features, including a bank of drawers, a pipe clamp vice, and an integrated extension cord outlet with a power switch. These additions would not have been possible without considering how I wanted to learn and expand.
