Making Tombstones from The Haunted Mansion
Last Updated: November 2024
As unabashed Disney fanatics, Halloween is a perfect time to turn our house into the Haunted Mansion. What haunt would be complete without a few tombstones inspired by the ones in the queue at Disney World?
Affiliate links are used on this page. See my disclosure page for info on affiliate programs.
Materials
1” Insulation Foam Board (2” would be better, but my local store was out of stock)
Sandpaper
Large Scrap Cardboard
1 - Cut Out Foam Blanks
I wanted to double-check the tombstone shapes and scaling before cutting the foam. Fortunately, we had some large cardboard pieces I used to check and use as cutting templates. I placed each cardboard template on the foam insulation sheet and marked the outline with a permanent marker.
Then, I carefully used a long utility knife to cut each piece out. Once I had one of each style, I used the cut foam pieces to mark and cut a second layer out. While laying out the main tombstone pieces, I kept larger sections of insulation sheet available for the feet. In the next step, while the body of the tombstones dried, I cut out the feet for three of the tombstones and the large base and arch for one.
2 - Glue Foam Panels
If you can find 2” insulation foam, you won’t need to glue the tombstone bodies together. Unfortunately, I only had 1” insulation foam and wanted it thicker. I first sprayed both sides with water to glue them together. Then, I liberally applied Gorilla Glue to one side, spread it around, and taped the sides together. The Gorilla Glue expands while drying, filling more of the porous foam board.
While the panels were drying, I cut out the feet in the previous step. I glued them up the same way and stacked the pieces for the large base.
3 - Carve Tombstone Inscriptions
We wanted the tombstones authentic to the Haunted Mansion queue, so we found images online of four we wanted to replicate. Using a projector, I traced the areas on the front of each tombstone that will be carved away. A vinyl cutter or printing the design on paper can also work to transfer the designs. However, the projector is much faster and can be scaled more easily.
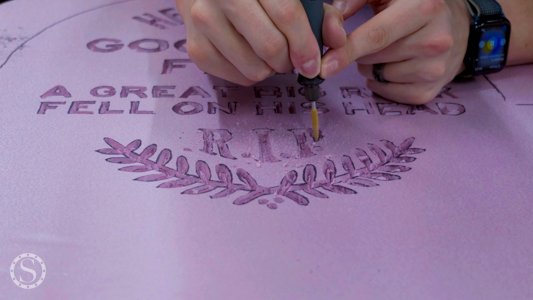
Once the designs were traced, I used my Dremel, a depth stop, and a V-bit to carefully carve the letters and icons. The depth stop kept the carving depth consistent, allowing me to focus on the shapes. Wear a respirator while cutting to avoid breathing in the foam board dust.
The v bit left a small ridge in the middle of some of the letters, so I used a tiny power carving bit to remove it. In some of the tighter areas, I used an Xacto knife to remove the ridges instead. I also used the knife to clean up areas where the Dremel got away from me.
4 - Glue Accent & Feet to Tombstones
Before gluing the accent onto one of the tombstones, I used sandpaper to smooth the cut areas inside the arch. It is significantly easier to smooth the inside arch before it’s glued. After smoothing, I glued it to the top of the tombstone and used blue tape to secure it while the glue dried.
The bottoms of the tombstones were too rough to attach to the feet. I used my planer sled at the table saw to flatten the bottom of each tombstone. Then, I glued the feet to the bottom of each tombstone and taped them in place.
The tombstone with the large base was tricker to secure. I secured it with tape and used a ratchet strap to apply pressure for a strong glue bond.
5 - Refine Shapes
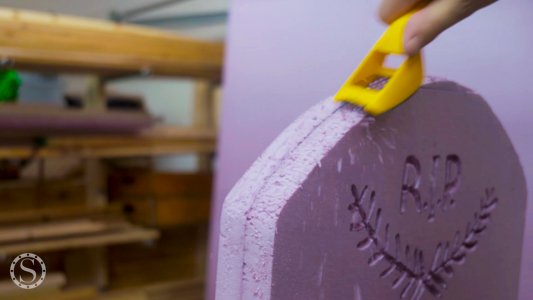
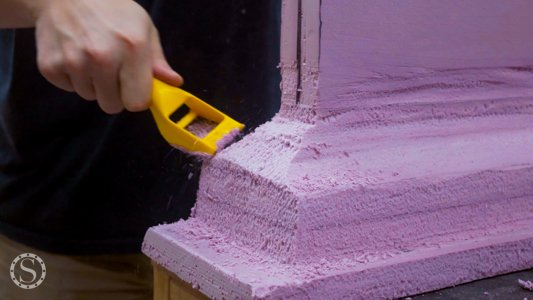
The tombstones still had rough sides and edges that I needed to refine. I used a foam rasp to clean up all the sides and refine the shape, then some sandpaper to smooth everything out.
The large base needed even more shaping, though, and the foam rasp would take forever to carve it all away. Instead, I used an angle grinder, a die grinder, and some power carving attachments to smooth the base and add an indented roundover. The power carving attachments make quick work of the soft foam, so I had to work carefully. Although I did use the foam rasp for the shorter sides to prevent tearing out, I also used sandpaper to leave a smooth surface.
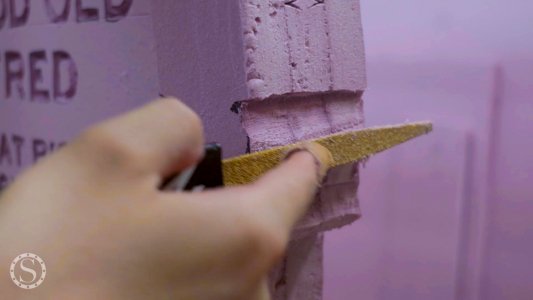
I also wanted to add an embellishment to the ends of the arch. I used my Dremel and two different burs to carve the curves. Finally, I used a fine hand rasp to smooth further and refine the shape.
6 - Add Texture and Sealant
The tombstones looked good but still looked like foam. I had seen some people successfully use a heat gun to add texture, but I was worried that it would widen out my letters and logos too much. Instead, I used some rattle cans of textured paint to transform the flat surfaces into rough stone.
The foam also needed to be sealed since these will be outside in the elements. I used a chip brush to apply two coats of Drylok Masonry Waterproofer to every surface on the tombstones, including the bottoms. Dabbing the sealer instead of brushing kept the stone-like texture. The Drylok also has a gritty texture, adding to the stone's appearance.
7 - Weathering
What good would clean tombstones be for a Haunted Mansion? I used a combination of watered-down black and brown acrylic paints to add dirt and grime to the tombstones. I used a chip brush to apply the paint liberally, then blotted most of it away with shop towels. If the paint build-up was too much, I sprayed more water and used it to take more paint off. Switching between black and brown paint added varying layers of colors, adding to the tombstone age. I also used green paint in the rotation to add organic growth like moss.
I also used a small paintbrush and mainly black paint to fill the engraved letters and logos. I let the paint build up inside the engravings, then wiped it down with the shop towel to make it appear that dirt had gotten in them and come out over time.
Finally, I dry brushed white paint on some corners and edges to make it appear that some of the stone had eroded over time, exposing more stone that hadn’t been weathered as much as the rest.
I am thrilled with how the tombstones turned out! They add to our outside Halloween decorations and go a long way to transform our house into The Haunted Mansion. We’re looking forward to using these every year and continuing to add to our haunt over the years with even more projects.


